User Permissions: Give Other Users Access to Specific Projects Only
It’s always been quite a challenge to use SEO tools when managing a large number of websites and projects without assigning user permissions. As an account owner, you often don’t have an option to choose between offering users full access to the data or restricting them to only being able to view reports but not change anything.
Things are so different for Wincher users. When using our tool you’re the one who decides what roles to assign to your team members or any external users and to what projects they have access.
In this guide you’ll learn:
- How to manage users and permissions
- What roles you can assign to users
- How to assign a role for a specific project
Managing users and permissions
You can be an owner or user of a certain project. Each of the roles has different rights and capabilities. You can grant permissions to other users only if you are an owner or an administrator.
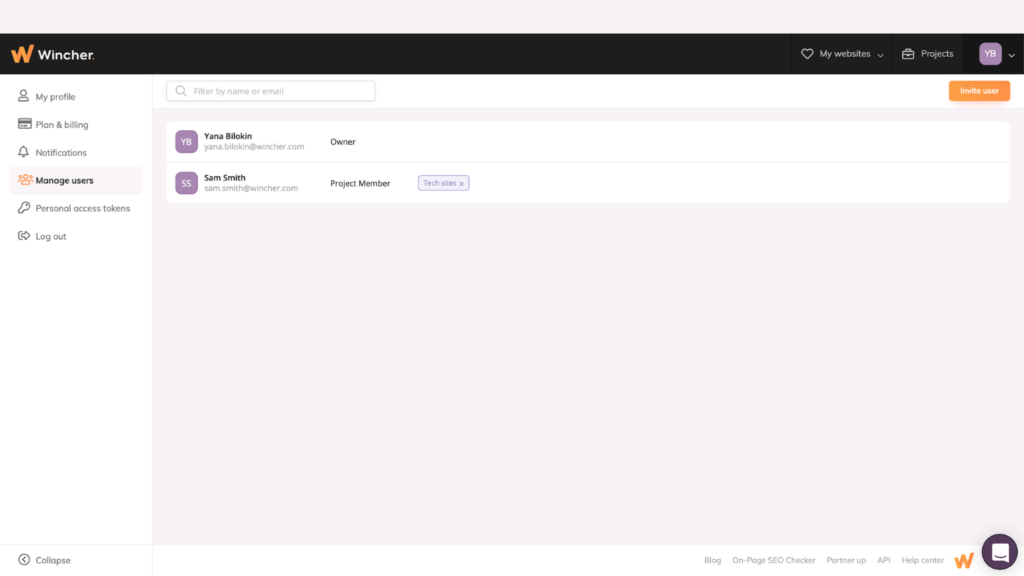
See and manage the user list on the “Manage users” page.

What Roles You Can Assign to Users in Wincher?
Each user can be assigned one of the following permissions for a certain project:
Owner. Has full access to all projects, can invite and manage all types of users, and can manage the account’s plan and billing.
Administrator. Has full access to all projects and data and can invite and manage project members and external users.
Project member. Has access to view and manage websites in assigned projects.
External user. Has access to view websites in assigned projects.
User permissions will enable you to give your team members and external users access to specific projects only. Also, you’ll be able to restrict users to only being able to view reports but not change any data.
How to Assign a Role for a Specific Project?
Step 1: Create a Project
In order to grant any role to the user, you need to create a project in order to have a place where those roles can be assigned to.
First, click on the “PROJECTS” button at the top right corner and you’ll be navigated straight to the required page. Then, just click on “CREATE YOUR FIRST PROJECT” if you’re new in here, or hit “CREATE PROJECT” at the top right corner if that’s not your first one on Wincher.

Now all you have to do is to create a name for your project and add websites that should be included in it.

Step 2: Invite a User
Click on the arrow right to your profile’s picture (or its absence in my case) and head down to “MANAGE USERS”.

If you don’t have any users added, your page will look like this. Click on “INVITE MY FIRST USER” and let’s keep on going. It’ll be easy!

In order to invite a new user just fill in the fields with the person’s first and last names and don’t forget about adding an email. Your invitee will shortly receive an email with further instructions.
After, you have to choose one of the roles available on our platform. These are the owner, administrator, project member, and external user.

After all that is done, it’s time to assign this particular user to the earlier created project (or an old one if that’s your case).

When your invitee receives an email, he/she has to confirm it first. Until then, you’ll see the “PENDING INVITE” status.

To check whether the user has been assigned to a particular project, just click on “PROJECTS” at the top right corner and you’ll be able to see all the participants as well as your project’s details here.

It’s All About Experience
We do our best every day to provide you with features that will bring value to your SEO efforts. This way, you won’t need to use any bulky and complicated tools anymore. The easy-to-use interface of Wincher will ensure a seamless experience from the beginning.
With Wincher you have full control over your projects and our feature “user permission” will enable you to assign roles to other users in just a few clicks. Easy and fast!
Curious if this feature will work for you? Then give it a try and you’ll know it for sure! Also, feel free to visit our pricing page to figure out which plan fits your business needs the most.


